The short answer
Start with an identified vacuum platform and a clear customer-facing distinction. Classify each physical change by its effect on appearance, function, packaging and documentation. Approve real materials, complete tool bundles and localized instructions together, then connect engineering revisions, artwork, product identifiers and packed samples to a controlled production release.
Introduction
Private-label vacuum customization succeeds when the approved product, the retail package, and the customer's first use all express the same configuration. Adding a logo is only one part of that work. Colors, surface finishes, accessories, labels, instructions, and packaging inserts can each change what the buyer must approve and what the factory must control.
For importers sourcing handheld and stick vacuums, the key decision is how much differentiation the product needs and which changes justify engineering work. A carefully chosen tool bundle or clear localized manual may support the intended customer better than an expensive enclosure change. The correct answer depends on the product role, retail presentation, service model, and expected order structure.
This guide explains how to turn physical branding and configuration requests into an approval process. It covers practical questions for samples, artwork, materials, engineering changes, and package identity. Examples are hypothetical planning scenarios. No customization option, development charge, tooling arrangement, or minimum order is implied to be available from RoboMeka without a configuration-specific discussion.
Begin with the base appliance and the differentiation goal
Identify the exact appliance before discussing branding. Record its model, main assemblies, battery and charger where relevant, floor head, handheld accessories, and intended storage method. Ask which elements belong to an established configuration and which would be newly developed. A recognizable body shape alone is not enough to establish that two proposed samples share the same underlying product.
Describe the customer-facing distinction in one sentence. A compact apartment bundle may emphasize easy storage and a small set of useful tools. A family-home bundle may emphasize floor versatility and understandable maintenance. A handheld car-cleaning product may need accessories with different reach and geometry. These descriptions help prevent a customization brief from becoming a collection of unrelated visual preferences.
Review the cordless stick vacuum category as a starting point, then request the proposed base configuration in writing. If the project instead concerns floor washing, treat the wet and dry vacuum range as a separate application discussion. A dry vacuum should not acquire wet-use positioning simply through different artwork or an additional accessory name.
Set a boundary for the first launch. Decide which changes are necessary for market entry and which could follow after product feedback. This is a commercial planning choice, not a reason to leave important instructions unfinished. The initial configuration still needs complete approval, but optional cosmetic variations do not have to expand the first production release indefinitely.
Classify changes by what must be reapproved
A useful customization classification follows the effect of the change. Printed branding may primarily need artwork, placement, and durability review. A new molded color needs a physical material and appearance reference. A different floor head can affect handling and performance. A revised latch or housing can require engineering evaluation and changes to the relevant technical evidence.
Ask the supplier to explain the approval impact of each request before agreeing to a development scope. The answer should identify affected drawings, purchased parts, assembly processes, test work, packaging, and service information. This makes the cost discussion more concrete: the buyer can see whether a seemingly small visible change creates work elsewhere in the product.
| Customization request | Main approval object | Important follow-up question |
|---|---|---|
| Printed brand mark | Artwork and decorated physical sample | Does placement interfere with labels or normal handling? |
| New molded color | Material, finish, and color reference | Does the change affect other material requirements? |
| Revised tool bundle | Complete accessory configuration | Are fit, use instructions, and package cavities updated? |
| New retail carton | Dieline, print proof, and packed sample | Is protection appropriate for the distribution route? |
| Localized manual | Language master and actual product walkthrough | Do illustrations and maintenance steps match the unit? |
| Housing or latch change | Drawings and engineering approval | Which evaluations and service parts must be reviewed again? |
Keep the classification open to revision. A logo applied to a removable cap might be simple, while a molded logo in a structural housing can involve a different decision. The practical distinction is the work required to maintain the intended product behavior and identity. Marketing terms such as OEM and ODM cannot replace that project-specific explanation.
Specify color and finish on real materials
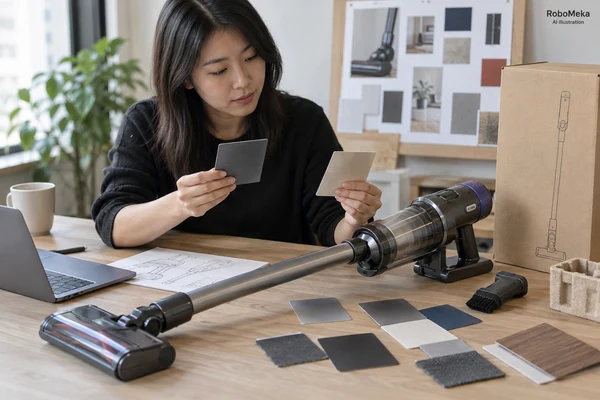
A color name or a screen rendering is an incomplete production reference. Identify the part, substrate, surface texture, finish, and physical color target. Ask how adjacent components made from different materials will be compared. A painted tube, molded handle, and flexible grip can appear different even when a visual concept assigns them the same nominal color.
Review samples under agreed lighting and viewing conditions. Include the angles at which customers handle and display the appliance. Gloss, texture, and curvature can change appearance, so photographs should support the physical reference rather than replace it. Record accepted differences where a perfect visual match is neither practical nor necessary for the intended design.
Consider the actual user contact areas. A finish on a grip, release button, or dust-bin surface has a different use pattern from a decorative panel. Ask what appropriate wear, cleaning, or handling evaluations the supplier recommends and what evidence will support approval. Do not approve a premium-looking finish solely because it photographs well before ordinary use.
Also ask whether the proposed color affects material sourcing or minimum batch requirements. Request the reason for the constraint and identify who owns unused custom material if the order changes. Avoid assuming that every color can be run at the same commercial terms. The negotiation should reflect the actual part and process rather than a blanket customization fee.
Approve brand placement without obscuring product information
Provide controlled logo artwork with its intended dimensions, orientation, placement, and reproduction method. Review it on the physical appliance and all relevant accessories. A brand mark that looks balanced in a flat drawing may become distorted across a curved surface or partly hidden when the vacuum is assembled. Placement should be evaluated in the normal product configuration.
Keep brand artwork distinct from model identity and other required product information. The supplier and buyer should agree which party provides each label's content and which party checks its applicability to the destination market. This article does not define a universal labeling scheme; the purpose is to ensure that decorative changes do not accidentally replace or obscure information needed for the actual project.
Specify how the approved artwork is named and released. A preview sent in a messaging thread should not become the only record of production approval. Maintain the final artwork file, physical reference, revision, and approval date together. If a brand team later modifies spacing or lettering, the supplier should be able to identify which order uses which version.
Review durability in proportion to the application. Printed marks on frequently touched surfaces may need a different evaluation from marks protected inside a package. Ask for a proposed method and agreed outcome, not an unsupported promise that the logo is permanent. The purchasing requirement should remain clear enough for both sample review and later shipment inspection.
Build accessory bundles around useful cleaning tasks
Choose tools by what customers need to reach, clean, and store. Adding attachments can make a package look generous while increasing confusion if their roles overlap. For each proposed tool, identify the intended surface, fit to the appliance, instructions, and storage position. Ask whether it changes the operating mode, handling, or performance claims associated with the base unit.
A hypothetical apartment bundle might retain a floor head, crevice tool, and a compact storage arrangement. A separate car-cleaning bundle might prioritize handheld access and suitable interior attachments. These are planning examples, not recommendations for an unexamined product. Each proposed accessory still needs review with the actual appliance and the surfaces described in its customer instructions.
Confirm connector fit and retention on production-intended samples. An accessory that attaches once during a sales demonstration has not necessarily answered questions about ordinary assembly, removal, and storage. Review the approved use method and service replacement identity. If tools from different supplier families are mixed, document their compatibility rather than assuming a similar-looking connector establishes it.
At this stage, send your private-label vacuum configuration requirements with the base product, intended customer, colors, branding locations, accessory roles, and packaging channel. The RoboMeka OEM and ODM overview can support the discussion, while the project brief should identify the exact physical changes that need feasibility, quotation, and sample approval.
Treat packaging as part of the product configuration
The packaging brief should describe how the product will move and be sold. A retail carton transported in a master carton may face a different route from a package sent individually to an online customer. Confirm the appliance position, accessory retention, protective materials, printed panels, carrying features if any, and the opening sequence expected during unpacking.
Packaging evaluation should match the relevant distribution environment. ISTA distinguishes screening approaches from simulations associated with transport conditions and advises users to understand their actual distribution route. Use that guidance to discuss an appropriate package evaluation with a qualified provider rather than selecting a test name only because it appears familiar. See ISTA's design and testing guidance.
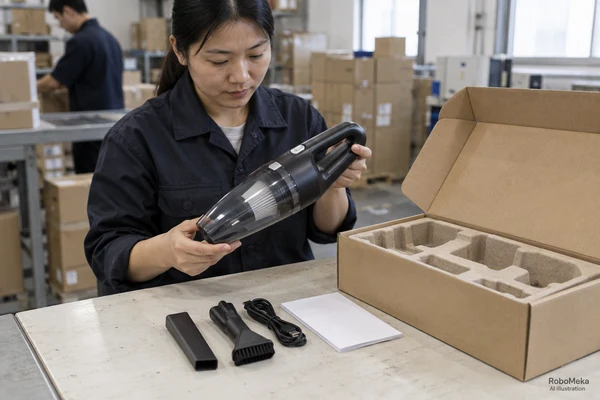
Approve a fully packed sample with the intended accessories and inserts. Check whether parts can move into damaging contact, whether the customer can identify the contents, and whether the package can be opened without confusing assembly. Review the relationship between protective packaging and visible presentation; removing material for appearance alone may change the protection that was previously evaluated.
If the product, accessory composition, protective insert, or distribution method changes, review whether packaging evaluation needs to be repeated. ISTA specifically identifies product, package, and process changes as relevant to retesting decisions. That is a reason to connect bundle approval with package approval, not a claim that every artwork adjustment requires the same test program. See ISTA's packaged-product retesting guidance.
Keep product identity and manuals synchronized
Create a configuration record that connects the appliance model, retail bundle, carton artwork, manual revision, and relevant identifiers. Retail and warehouse teams need to distinguish what is actually inside each package. A color or accessory variant should not rely entirely on a photograph that may be reused across listings or changed during a campaign.
Where GS1 identification is used, review the applicable rules for the actual change. The GTIN Management Standard addresses changes including primary brand and predefined assortments. It does not mean every minor design edit receives the same identification treatment. The brand owner should make the decision using the standard and relevant trading-partner requirements. See the GS1 GTIN Management Standard.
For the manual, begin with an approved content master that matches the product. Verify assembly, charging if applicable, operating modes, accessory use, emptying, maintenance, and support instructions against the physical unit. Localization should preserve technical meaning and usable illustrations. A fluent translation of an outdated manual can still teach customers the wrong procedure.
Walk through the first-use sequence with a reviewer who has not helped develop the product. Observe whether they identify the right parts and understand installation preparation for the storage arrangement. Collect specific ambiguities and correct the content. This is a recommended usability exercise, not a claim that a particular sample has passed a formal customer study.
Separate engineering approval from appearance approval
Use distinct approval states for concept, appearance, function, and production readiness where the project requires them. A decorated sample may show the intended logo while using a temporary material or hand-finished part. Mark that limitation explicitly. Otherwise, the visual sample can be mistaken for evidence that the production process and complete engineering configuration are already accepted.
For structural changes, request the drawing revision, reason for change, affected components, and proposed evaluation plan. Ask how the change affects assembly, service access, tooling, and related evidence. The responsible technical team should determine what must be reviewed again. A small dimensional adjustment may have consequences beyond appearance when it changes fit, retention, or the airflow path.
Discuss tooling and engineering charges separately from recurring unit prices. Identify the deliverable, payment milestone, ownership or usage arrangement, maintenance responsibility, and what happens if the design changes. These terms should be written for the actual project; there is no universal arrangement that can be inferred from the phrase private label.
Before production release, collect the approved sample references, drawings, bill of materials or controlled configuration, artwork, manual, package record, and unresolved-deviation decisions. The manufacturing overview provides context for a production discussion, but the release package should identify this specific order. That allows factory testing and shipment inspection to follow a common definition of the product.
Frequently asked questions
Is changing the logo enough to create a private-label vacuum?
A logo can form part of a private-label arrangement, but the buyer still needs a defined appliance configuration, package identity, instructions, and support plan. Confirm exactly what the supplier includes. Physical branding should not be treated as evidence that accessories, documentation, engineering responsibilities, or ownership terms have also been agreed.
Should buyers approve colors from digital renderings?
Digital renderings are useful for early direction, but they do not fully define production appearance. Approve the intended material, finish, and physical color reference under agreed viewing conditions. Review neighboring components together, especially when they use different materials or processes, and record any accepted differences in the final sample documentation.
Does changing a tool bundle require new packaging review?
It can. Different tools may alter internal retention, weight distribution, protection, unpacking, and product identification. Review the fully packed configuration and determine the appropriate package evaluation with the supplier or test provider. Update the contents description and manual so the delivered accessories match the customer's expectations and approved retail listing.
Who should approve a customized vacuum before production?
Assign clear roles for appearance, technical behavior, packaging, documentation, and commercial release. One buyer-side coordinator should consolidate those decisions into a controlled approval record. The supplier should acknowledge the same revisions and any approved deviations, so production does not depend on several inconsistent samples or informal messages from different reviewers.
Conclusion
Effective vacuum customization turns a brand concept into an identifiable physical product. Choose a base appliance that fits the customer, define the value of each change, and link colors, accessories, packaging, instructions, and engineering revisions to clear approval records. The resulting configuration should be understandable to the factory, the inspector, the retailer, and the customer opening the carton.
To begin a concrete review, prepare your private-label vacuum inquiry brief with the intended market, product role, preferred appearance, accessory bundle, packaging route, and changes requiring development. Include available artwork and the decisions still open. RoboMeka can use that information to discuss the proposed configuration, sample sequence, and project-specific approval requirements.